> ## Documentation Index
> Fetch the complete documentation index at: https://docs.saucerswap.finance/llms.txt
> Use this file to discover all available pages before exploring further.
# Swap
## How to Swap Tokens: Instructional Video
## How to Swap Tokens: Written Guide
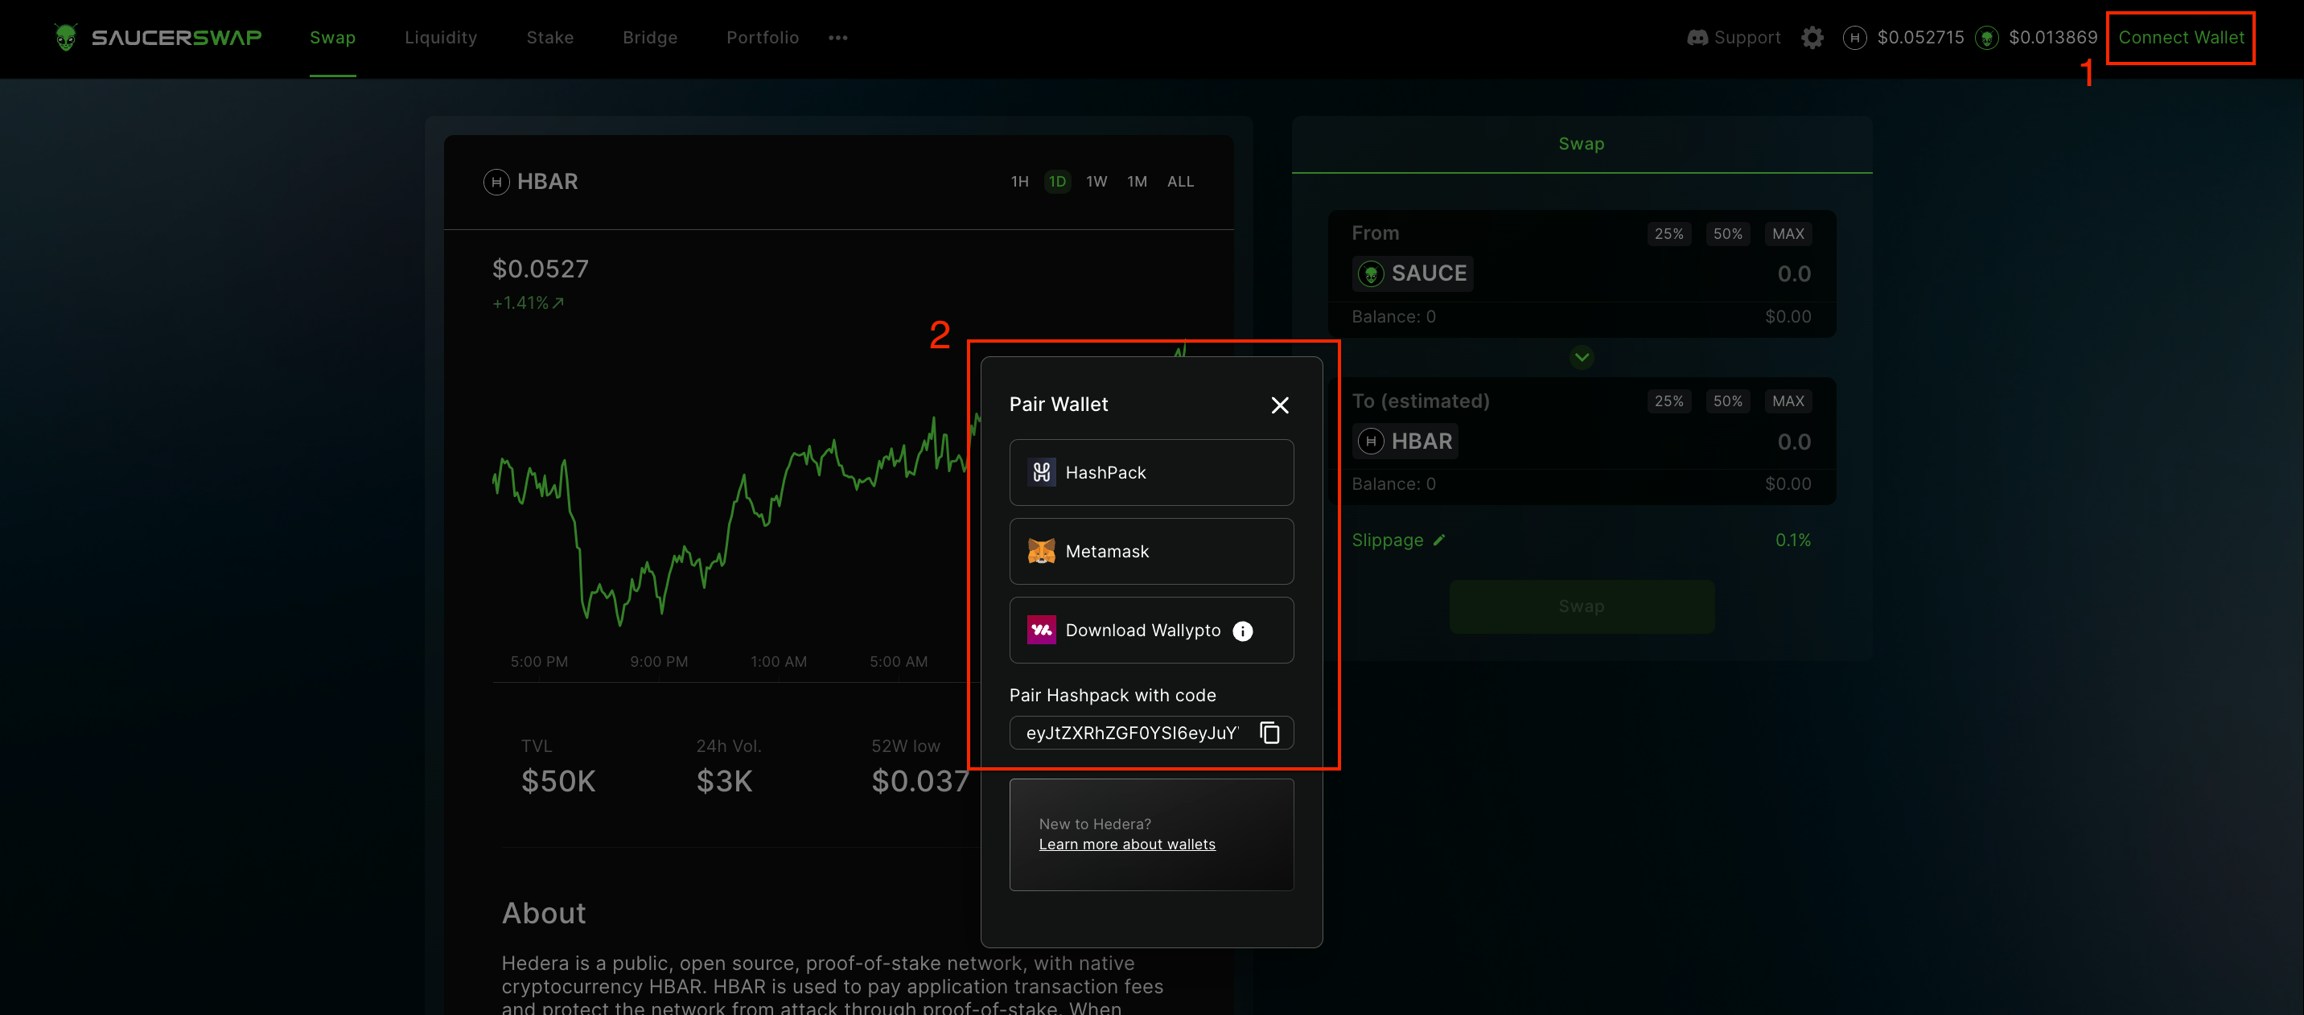
1\. **Prerequisites**
* Launch the web-app and connect your [wallet](/get-started/hedera-guide/create-hedera-wallet).
* Ensure you have sufficient [HBAR](/get-started/hedera-guide/get-hbar) for network fees and tokens to swap.
2\. **Navigate Interface**
* Head over to the "Swap" page.
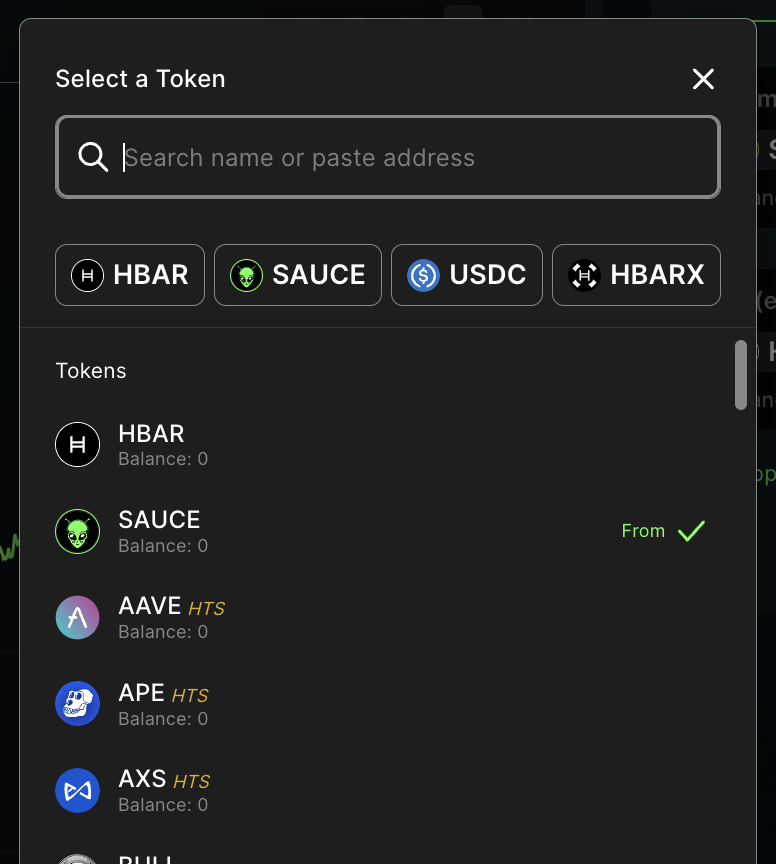
3\. **Specify Swap Details**
* Click on "TokenA" to bring up the token menu.
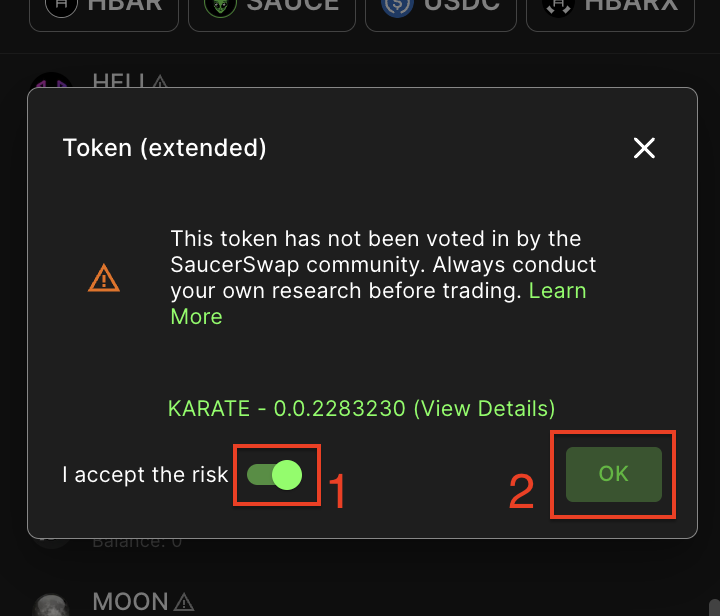
* Choose from a list of [Default and Extended tokens](/contact/partnership-inquiries#token-listing).
* For Untracked tokens, manually enter the token ID (e.g., *0.0.123456*).
* A disclaimer must be acknowledged for Extended and Untracked tokens.
* Repeat the above step for "TokenB."
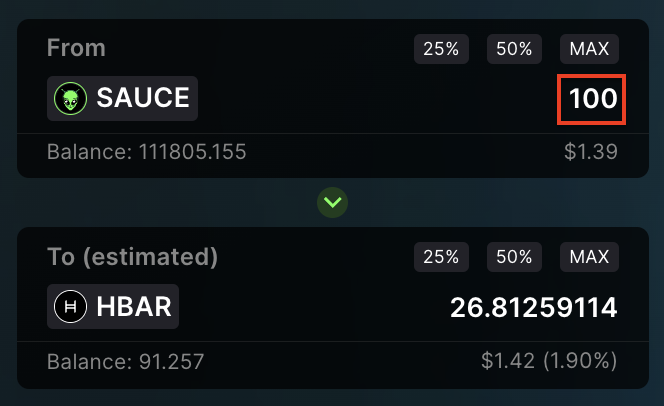
* Input the quantity of tokens you wish to swap.
**ExactInput:** Swap an exact amount of TokenA for an estimated amount of TokenB.
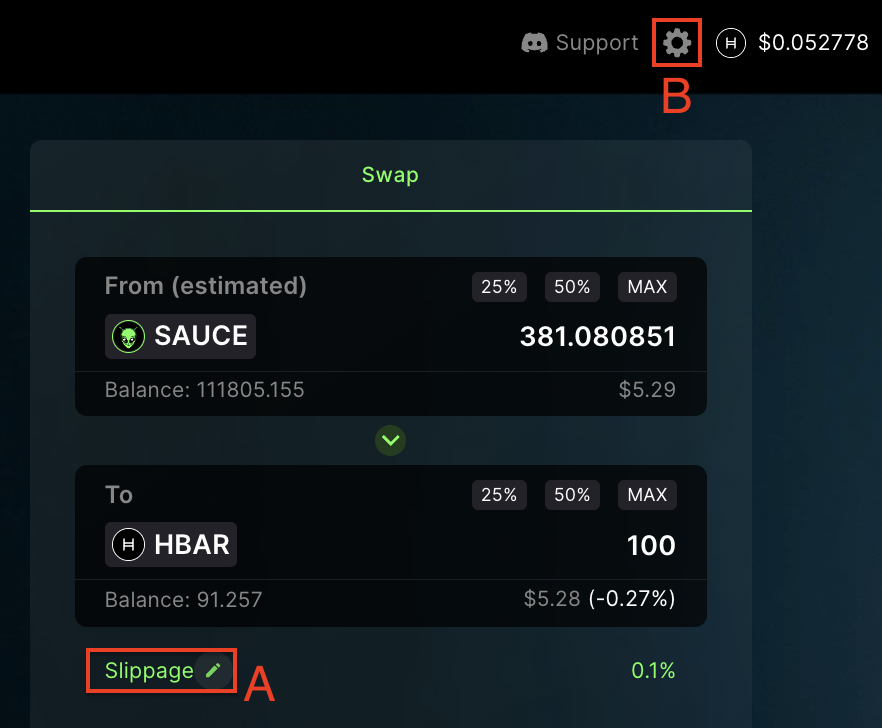
**ExactOutput:** Swap an estimated amount of TokenA for an exact amount of TokenB.
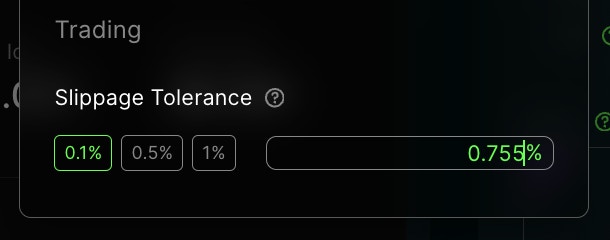
* Set your preferred slippage tolerance in the settings. E.g., a 0.1% tolerance will cause the swap to fail if slippage exceeds this value.
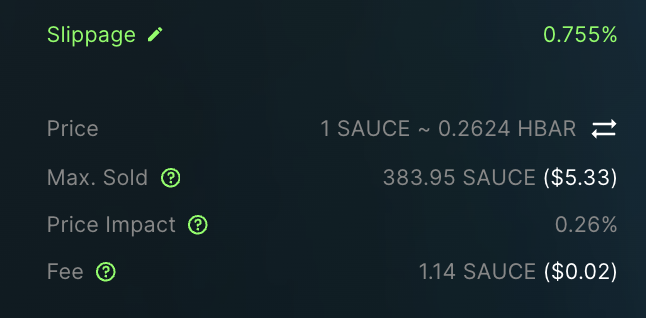
* **Slippage Tolerance:** This represents the [slippage](/get-started/faq#what-is-slippage) you are willing to tolerate in a trade. The default setting is 0.5%, but can be adjusted based on factors such as liquidity. To modify, click the pencil icon next to 'Slippage' or use the gear icon in the navigation bar. A lower value provides price accuracy but may result in failed transactions. Conversely, a higher value boosts transaction success rate but could lead to price discrepancies.
* Review swap details.
* **Min. Received:** The minimum amount of TokenB received on a swap. This appears for `ExactInput` swaps and varies, depending on the slippage tolerance.
* **Max. Sold:** The maximum amount of TokenA sold on a swap. This appears for `ExactOutput` swaps and varies, depending on the slippage tolerance.
* **Price Impact:** The percentage difference between the market price and the estimated swap price. Higher impact indicates a less favorable swap, often due to low liquidity. Lower impact is usually better and occurs in high-liquidity pools.
* **Fee:** A swap incurs a fee ranging from 0.05% to 1.00%, depending on the liquidity pool. Of this fee, 5/6 is allocated to liquidity providers, while 1/6 goes to the protocol. Keep in mind that this is separate from Hedera network fees. Multi-hop swaps incur a fee for each involved liquidity pool.
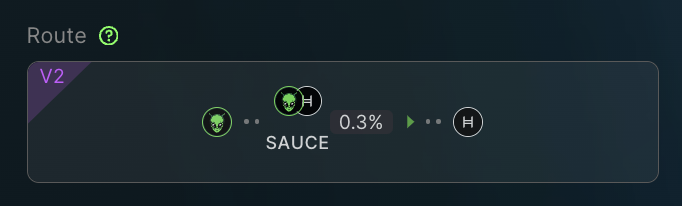
* You can toggle between alternative routing options, however note that the optimal route is selected by default.
4\. **Execute Swap**
* Opt between a one-time or max [token allowance](/get-started/faq#what-is-a-token-allowance).
* Click the "Approve & Swap" button.
* Complete the transaction in your wallet.
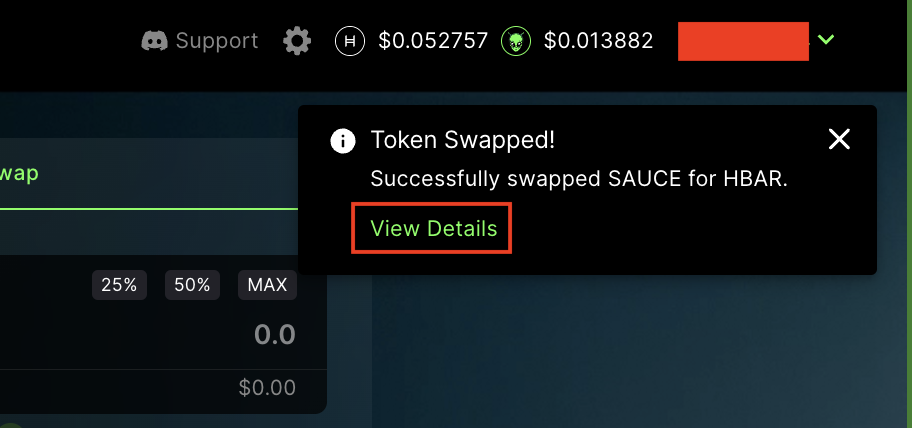
5\. **Transaction Confirmation**
* Post-transaction details can be viewed on [HashScan](https://hashscan.io/mainnet/dashboard).
 * Ensure you have sufficient [HBAR](/get-started/hedera-guide/get-hbar) for network fees and tokens to swap.
 2\. **Navigate Interface**
* Head over to the "Swap" page.
2\. **Navigate Interface**
* Head over to the "Swap" page.
 3\. **Specify Swap Details**
* Click on "TokenA" to bring up the token menu.
3\. **Specify Swap Details**
* Click on "TokenA" to bring up the token menu.
 * Choose from a list of [Default and Extended tokens](/contact/partnership-inquiries#token-listing).
 * For Untracked tokens, manually enter the token ID (e.g., *0.0.123456*).
* A disclaimer must be acknowledged for Extended and Untracked tokens.
* For Untracked tokens, manually enter the token ID (e.g., *0.0.123456*).
* A disclaimer must be acknowledged for Extended and Untracked tokens.
 * Repeat the above step for "TokenB."
* Input the quantity of tokens you wish to swap.
**ExactInput:** Swap an exact amount of TokenA for an estimated amount of TokenB.
* Repeat the above step for "TokenB."
* Input the quantity of tokens you wish to swap.
**ExactInput:** Swap an exact amount of TokenA for an estimated amount of TokenB.
 **ExactOutput:** Swap an estimated amount of TokenA for an exact amount of TokenB.
 * Set your preferred slippage tolerance in the settings. E.g., a 0.1% tolerance will cause the swap to fail if slippage exceeds this value.
* **Slippage Tolerance:** This represents the [slippage](/get-started/faq#what-is-slippage) you are willing to tolerate in a trade. The default setting is 0.5%, but can be adjusted based on factors such as liquidity. To modify, click the pencil icon next to 'Slippage' or use the gear icon in the navigation bar. A lower value provides price accuracy but may result in failed transactions. Conversely, a higher value boosts transaction success rate but could lead to price discrepancies.
* Set your preferred slippage tolerance in the settings. E.g., a 0.1% tolerance will cause the swap to fail if slippage exceeds this value.
* **Slippage Tolerance:** This represents the [slippage](/get-started/faq#what-is-slippage) you are willing to tolerate in a trade. The default setting is 0.5%, but can be adjusted based on factors such as liquidity. To modify, click the pencil icon next to 'Slippage' or use the gear icon in the navigation bar. A lower value provides price accuracy but may result in failed transactions. Conversely, a higher value boosts transaction success rate but could lead to price discrepancies.
 * Review swap details.
* **Min. Received:** The minimum amount of TokenB received on a swap. This appears for `ExactInput` swaps and varies, depending on the slippage tolerance.
* **Max. Sold:** The maximum amount of TokenA sold on a swap. This appears for `ExactOutput` swaps and varies, depending on the slippage tolerance.
* **Price Impact:** The percentage difference between the market price and the estimated swap price. Higher impact indicates a less favorable swap, often due to low liquidity. Lower impact is usually better and occurs in high-liquidity pools.
* **Fee:** A swap incurs a fee ranging from 0.05% to 1.00%, depending on the liquidity pool. Of this fee, 5/6 is allocated to liquidity providers, while 1/6 goes to the protocol. Keep in mind that this is separate from Hedera network fees. Multi-hop swaps incur a fee for each involved liquidity pool.
* Review swap details.
* **Min. Received:** The minimum amount of TokenB received on a swap. This appears for `ExactInput` swaps and varies, depending on the slippage tolerance.
* **Max. Sold:** The maximum amount of TokenA sold on a swap. This appears for `ExactOutput` swaps and varies, depending on the slippage tolerance.
* **Price Impact:** The percentage difference between the market price and the estimated swap price. Higher impact indicates a less favorable swap, often due to low liquidity. Lower impact is usually better and occurs in high-liquidity pools.
* **Fee:** A swap incurs a fee ranging from 0.05% to 1.00%, depending on the liquidity pool. Of this fee, 5/6 is allocated to liquidity providers, while 1/6 goes to the protocol. Keep in mind that this is separate from Hedera network fees. Multi-hop swaps incur a fee for each involved liquidity pool.
 * You can toggle between alternative routing options, however note that the optimal route is selected by default.
 4\. **Execute Swap**
* Opt between a one-time or max [token allowance](/get-started/faq#what-is-a-token-allowance).
4\. **Execute Swap**
* Opt between a one-time or max [token allowance](/get-started/faq#what-is-a-token-allowance).
 * Click the "Approve & Swap" button.
 * Complete the transaction in your wallet.